
There are four main types of search engine optimization (SEO): Local SEO, Technical SEO, On-Page SEO, and Off-page SEO.
Technical SEO is all of the tactics and strategies that are implemented to make it as easy as possible for search engine spiders to crawl and index your website. Technical SEO is the aspect of SEO that is not directly related to your content. It is the initial behind-the-scenes tactics that you need to roll out prior to moving forward with an aggressive content strategy. Areas like site speed, site architecture, and proper server configuration are all high-level topics of technical SEO.
Below I have provided twenty technical SEO tips for your business’s website. Be sure to bookmark this guide so you can use it as an ongoing reference point. If you do your own SEO, make sure you have addressed all of the tactics below. If you have outsourced your SEO, bring this guide to your next meeting with your SEO partner and see if there are any areas that are not being addressed.
1. Use Google Search Console

If you haven’t already done so, sign up for Google’s Search Console. Search Console ensures that Google can index your content, and that you can submit new content that you need indexed, remove content that you do not want to show up on a Google search, monitor malware and spam, analyze which search queries are making your site show, and much more.
If you are new to Google’s Search Console, you will have to add your site and verify ownership. This is a very simple process, and Google provides several options for verification. You can verify your site by uploading an HTML file, verify through your domain provider, add an HTML meta tag to a certain page, use Google Analytics to track code, or use Google Tag Manager. Personally, I find the method through the domain provider to be the easiest because you don’t have to install any code. But, each option is fairly simple, and Google provides clear instructions.
2. Create HTML and XML Sitemaps
In the footer of a website, have you ever noticed a link to a tab titled “sitemap”? This is the HTML sitemap and is intended to make it easier for visitors to understand your site structure by viewing the sitemap.
The sitemap is a bulleted outline text version of the site navigation. The anchor text is clickable. They used to be much more popular. An HTML sitemap will not immensely help or hurt your SEO.
An XML sitemap, on the other hand, is extremely important. This sitemap is not for site visitors but for search engines. It helps search spiders crawl content quickly and ensures that all content is indexed. Search engine spiders are getting smarter and smarter, but sometimes they can miss certain pages. An XML sitemap ensures no pages are missed.
You’ll need to upload your sitemaps to Google’s Search Console and to Bing Webmaster Tools.
The easiest way to create and update your sitemap is by using a plugin. The most popular sitemap plugins are Google XML Sitemaps, and Yoast.
Adding your sitemap to Google is very straightforward. Log in to Search Console. Click Crawl > Sitemaps. Then click Add, which will add all of your sitemaps at once.
In Bing Webmaster Tools, go to the sitemaps navigation section and enter your sitemaps.
3. Robots.txt

You will need to add a robots.txt file to the root folder of your site in order to give instructions about your site to web robots. I know it sounds a bit bizarre and highly technical, but it’s actually pretty easy to accomplish. The technical term for this process is called “The Robots Exclusion Protocol.”
Reference Google’s instructions for creating your robots.txt file.
The purpose of this file is to tell search engines which parts of your site you do not want accessed by search engine crawlers. So, your XML sitemap indicates which pages you want crawled, and your robots.txt file indicates which pages you do not want crawled.
For example, let’s say you set a new site live but you do not yet want it crawled. Or, you have duplicate content that you are going to handle via your robots.txt file.
Keep in mind that these files are public, so do not include sensitive or private data in them.
It’s important that the robots.txt file exists even if it is empty. Create this file with caution, and make sure you do not accidentally exclude any important site files!
4. Avoid Cloaking
Make sure you are not cloaking! Cloaking is a black hat SEO tactic that shows one version of a webpage to users and a different version to search engines. Below board marketers use this trick to fool publishers and game the system. Unfortunately, sometimes honest site owners are cloaking by complete accident. They may have had high turnover with web developers and SEO professionals, and they don’t even know it’s going on.
Search engines want to see the exact same results that users are seeing. Any attempt to be deceptive will only work in the short term and ultimately result in penalties that can take months to recover from. Cloaking is a clear violation of Google’s Webmaster Guidelines.
Sometimes a site will be loaded with content that is difficult for search engines to access, like too much JavaScript, images, and Flash. So, uneducated developers will turn to cloaking instead of taking the time to make the content more accessible to search engine spiders.
- Manage Your 301 Redirects Properly
301 redirects are used to permanently redirect URLs to another URL. You are essentially updating a page as it shows in search results. These redirects are common in the following circumstances:
- You installed an SSL certificate and you want to redirect from HTTP to HTTPS.
- You have an entirely new domain and want to redirect your old site.
- You are merging multiple websites and need to make sure links to outdated URLs are redirected to the correct pages.
- You are redirecting 404 error pages and expired content to newly produced relevant content.
- Visitors are accessing your site through multiple domains. You can pick one of the domains and use 301 redirects to direct all of the other domains to your preferred domain.
Keep in mind that you will want to avoid lengthy redirect chains. Redirect chains are a series of 301 redirects that force the user from one URL to another, and then another, etc. This will have negative implications on authority and link juice. These lengthy redirect chains will also impact the load time of your site. As you know, slowing down your site will impact your SEO and the overall user experience.
Fortunately, there is a tool out there that will help you identify redirect chains: Screaming Frog. Log in to Screaming Frog, select Report, and select Redirect Chains from the pull-down menu. Analyze the report, send it to your IT or web development team, and you are on your way to cleaning up those annoying redirect chains and keeping your site’s link structure nice and tidy.
Make sure you also look for canonical tags that cause 301 redirects. From my experience, people tend to get confused between when to use a 301 redirect versus a canonical tag. When you have a canonical tag that redirects, you have also created a redirect chain. A canonical URL tells search engines that similar URLs are actually one in the same. Using a canonical URL improves your SEO by notifying Google which URL is canonical. You can identify which canonical tags also have a 301 redirect by also using Screaming Frog.
6. Unblock JavaScript and CSS
You may have seen an email from Google about unblocking JavaScript and CSS. The article was widely distributed last year and had web developers and SEOs freaking out. The alert was confusing and left people wondering why Google needed access to these files.
Google needs to render these files for the mobile-friendly algorithm and the layout algorithm. Google recommended unblocking these resources so they could provide the mobile-friendly tag in the search results and apply the appropriate boost in rankings.
You can find block resources by logging into Google Search Console > Google Index > Blocked Resources.
In most cases you will be able to unblock your JavaScript and CSS by checking the robots.txt and ensuring that you are allowing all CSS files to be crawled.
You may also want to learn about directives that you can add to your robots.txt file to ensure Google can crawl your JavaScript and CSS.
7. Manage Duplicate Content
This one is really easy and actually has more to do with the user experience than it does SEO. Duplicate content has a bad name and some SEOs are under the false impression that Google is on a witch hunt for duplicate content and will penalize every instance they find. Not true at all. Please keep in mind, I am mostly talking about redundant content on our own site and not plagiarized content. Plagiarized content is absolutely terrible, and I certainly do not condone any form of plagiarism. If you are concerned that someone is plagiarizing your content, you can use Copyscape to check.
Siteliner is another great tool to check your own site for duplicate content. It could be that you simply used too many of the same words on each page or maybe your copy just needs a makeover. Consider elaborating on each individual page or consolidating similar topics into one page, if possible.
If your site contains large amounts of similar content by design, there are a number of responsible ways to handle that situation. For example, 301 redirects, consistency in your URL linking, and the use of top level domains. For more tips on handling duplicate content, check out Google’s guidelines on duplicate content.
8. User Experience

When you think about your customers and prospective customers in lieu of Google’s algorithm, you will naturally do things that will improve your SEO. There is a natural crossover in ranking criteria and factors that contribute to a good user experience. If you visit a site that loads quickly and provides the information you are looking for, you are likely to stay on the site for an extended period of time while you browse products and services. You are happy because the site loaded quickly, and we know Google looks at site speed and pogo sticking. Pogo sticking is the act of immediately abandoning a site due to a bad user experience. This contributes to a high bounce rate and convinces search engines to lower your rankings.
Sites with thin content typically rank low and typically provide a low quality user experience. In my book, thin content is really a measurement of how much users engage with your content. For example, if users are pogo sticking, you will have a high bounce rate and have bad metrics for time-on-site. This could be a consequence of thin content.
To fix the problem, don’t just think about writing more content, but think about how you can increase value and provide site visitors with high quality content. If you can do this effectively, you will see visitors stay on your site longer and begin interacting with your brand. SEO is not just about attracting new site visitors; it’s about attracting the right site visitors to the right web properties and ultimately converting them to customers.
9. Structured Data/Microdata and Schema Markup
You have heard me advocate writing for your site visitors and not for search engines. Microdata is the exception to this rule and exists exclusively for search engines.
Microdata is an HTML specification that is used to nest metadata within existing content of webpages. Your site visitors will not see your microdata (unless they inspect your source code). But search engines can use your microdata to provide an enriched experience to site visitors.
There are a variety of different microdata vocabularies, but the most common is schema markup. Schema is the most comprehensive list of microdata and is supported by all major search engines. It is the only one you should use!
Think of microdata and schema as extra information search engines can use to show more relevant and enhanced content. The enhanced information they show is referred to as rich snippets or rich cards.
You will have a few different options for implementing schema:
- If you are using WordPress, the easiest way to implement schema is simply by using a plugin. Here are some top schema plugins.
- It’s no surprise that Google has a tool you can use.
- Add the schema manually. I wouldn’t recommend this unless you are really comfortable on the back end of the site or you have outgrown the limitations of the plugins. If you decide to implement the schema manually, be sure to check that your code is correct by using Google’s structured data testing tool.
Please note that adding schema will not directly impact your SEO rankings. It will also not guarantee that a rich snippet will be displayed on every search. However, if you use schema correctly, you can make your organic listing more attractive and consequently improve your click-through-rates.
10. Ensure Your Site is Mobile Friendly
According to a report from comScore, mobile now represents 65 percent of digital media time. It shocks me when I visit a site that is still not mobile friendly. Having a mobile-friendly site is an SEO ranking factor and a huge necessity to fulfill the user experience requirements.
You can use Google’s Mobile-Friendly Test to check if your site is mobile friendly. Below is the desired result you are striving to attain:
If your site does not pass the test, you need to make your website’s mobile friendliness a priority! You will have three options for configuring your mobile site.
Option 1: Responsive Web Design
This is my top choice and Google’s recommended design pattern. Responsive design serves the same code, with the same URL to all devices (desktop, phone, tablet). But the screen automatically renders to respond differently based on the screen size.
Option 2:Dynamic Serving
This uses the same URL for all devices but generates and serves a different version of HTML for different device screen sizes.
Option 3: Separate URLs
This strategy serves different URLs and different versions of HTML code to each device.
Once you ensure your site is responsive, you can view how it will appear on different devices by using Responsinator.
11. Custom 404 Error Pages
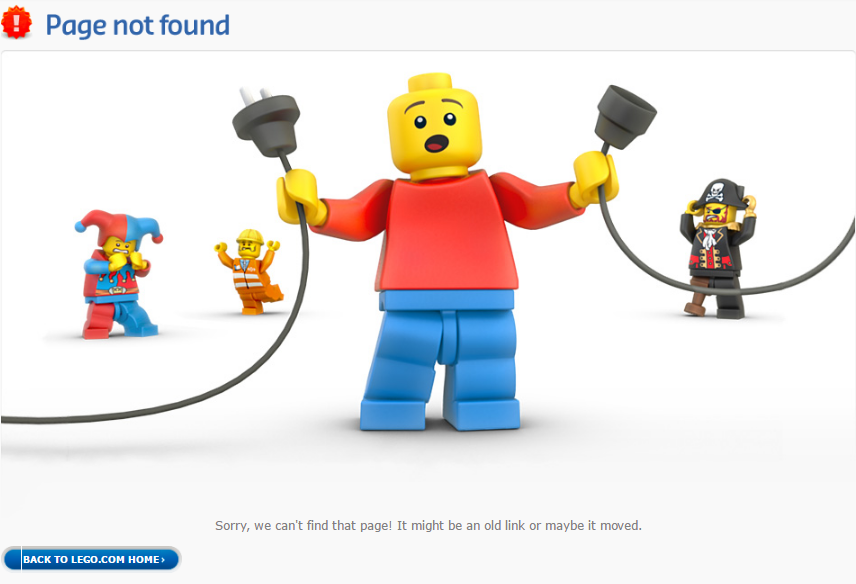
A 404 error occurs when a site visitor tries to access a bad link or a page that does not exist. It can be a bad experience for a user (even it was their fault) and cause them to backtrack and leave the site for good.
The good news is that there is a creative solution to the problem. You will want to create a custom 404 error page that displays when a user attempts to visit a page that does not exist. Here is where you can use a bit of light-hearted humor and attempt to persuade the user to stay on your site.
Here are some tips for your custom 404 error page:
- Notify the user that the page does not exist.
- Provide relevant and easy-to-access links to other content.
- Include an image.
- Consider a search box.
- Keep it fun!
12. Manage Your Plugins
You have probably heard someone talk about WordPress plugins slowing down websites. This could be true, and it’s important that you are mindful of the amount of plugins you have, the quality of those plugins, and your plan to manage them.
Plugins are created by developers of varying talent levels. The great developers are aware that site owners are cognizant of the impact a plugin will have on site speed, page load time, and user experience. Some plugins simply add a small query, which probably has almost no impact on your site’s load time. Other plugins add a jQuery file and a CSS stylesheet, which means you just added two HTTP requests every time a page needs to load. This can get ugly if you add ten or fifteen plugins that are adding twenty to thirty HTTP requests and slowing down your website.
My advice is to first make sure you really need the plugin before you add it to your site. If you determine that a plugin for your objective is necessary, do some homework on the best plugin before you add it to your site. Spend some time reading other users’ reviews and reading about the developer. A high quality and well-supported plugin will have good clean code and save you from headaches down the road. It’s not always the volume of plugins that slow a site down but often a few poorly coded plugins. Choose wisely!
13. Avoid Interstitials on Mobile
Interstitials ads are full screen ads that cover the interface of the webpage or app. They are a sure way for advertisers to get there ad noticed and an almost certain way to annoy users. When you visit a site via mobile or an app and an advertisement pops up on the screen, you are experiencing an interstitial ad. In this context, the word interstitial is referring to the advertisement standing “between” you and the page you intended to visit.
These ads are typically promoting a site’s native app, a mailing list signup, or even a certain product. They almost inevitably create a poor user experience.
Avoid these types of advertisements. Instead, use a simple banner that is in-line with your site’s content. Google has more recommendations on how to advertise on mobile without affecting the user experience.
14. Fix Crawl Errors
You obviously want to make sure Google can properly crawl your site. If you have crawl errors, make it a priority to fix them. You can check to see if you have errors by visiting Search Console. Log in to the Search Console, click Crawl, and then Crawl Errors.
You should be checking Search Console for crawl errors at least once a week. Most of the time they will show up in one of the following categories:
- HTTP
- In sitemaps
- Not followed
- Not found
- Restricted by robots.txt
- Soft 404s
- Timeout
- Unreachable URLs
Moz has a great guide on troubleshooting and fixing these common crawl errors.
15. Avoid Flash
While Google has made improvements to how they index Flash, it’s still a less than ideal choice. People have written lengthy postings on how to optimize Flash websites. To me, it seems like an uphill battle and all the tips seem like work-arounds. Why go against the grain and try to optimize a technology that is substandard for SEO and the user experience? Especially when there are plenty of alternatives and Google is frowning on Flash. Below are a few issues associated with a Flash website or websites with Flash components:
- Poor user experience
- Slower page load times
- Only indexed by Google and only partially indexed by Google
- Lacks on-page optimization elements: headers, alt tags, and meta titles
- Unplayable content like Flash videos on mobile
I see that last one all too often. Do not use a Flash video on mobile. Instead, consider HTML5 videos, which are accessible via mobile and are a much better choice.
16. Create a Great Internal Linking Structure
The process of creating thoughtful site architecture, a sound internal linking structure, and organizing your content is called siloing. Siloing essentially makes it easier for Google bots to crawl your content and follow internal links to find other related content. Of course, if you know this upfront, it’s much easier to design the layout of your website. If after reading this you determine that your site is not well laid out, you better get going on redoing the architecture!
Take https://rocketpilots.com/ for example. My site has a simple but thought-out site structure. Naturally, I have a home page and a Why Us page. The majority of my site is siloed by products: Custom Marketing Plans, SEO, PPC, Facebook, and Retargeting. To be upfront, I have a Pricing page where visitors can request a consultation, and of course I have a blog that a variety of users visit for education in digital marketing.
A blog is a great opportunity to silo content. In a blog, each category page links to a post in that category. Google’s spiders can land on the home page or a category page, and they are only a few clicks away from all of the most recent posts on the category pages.
The HubSpot Blog does a remarkable job of categorizing their content. First, they use high-level categories like sales and marketing. But, if you click on all topics, you can see that they are very granular when creating subtopics under the broader topics of sales and marketing.
When thinking about siloing your content, just remember that Google cares about displaying the most relevant content to users. The easier it is for Google to determine the specific content of your site pages, the more quality traffic you will receive.
17. Optimize Images

Using images in your content can be a great way to keep site visitors engaged. Images are especially important for long blog postings. For example, a 2,000-word write-up with strictly text can be a bit dull.
But adding pictures are not as straightforward as browsing to locate your media and uploading. There are important steps you must follow for SEO juice. Let’s take a look at a few of them:
- Pick your image partner! You can choose from sites like Shutterstock, iStock and Canva.
- Select the right file format: Go with JPEG, GIF, or PNG.
- Save your file with the keyword name such as marketingchart.jpeg.
- Alt Tags – Make sure the Alt tag description properly represents your image. The name of my file is typically the same as my Alt tag.
- Compress your image: Before uploading you can reduce your file sizes by using a tool like Compress JPEG.
- Use image sitemaps.
Improper use of images can bring your site to a crawl, negatively impact the user experience, and drop your organic rankings. Make sure you spend the necessary time to optimize your images.
18. Browser Caching
Every time a browser loads a website it downloads web files like HTML, CSS, JavaScript, and images. Each file is a separate request to the server. The more you make your server work, the more likely your page load time will be slow.
Browser caching can help solve this problem by storing files in the site visitor’s browser. Now, when the user navigates from page to page or leaves and returns to your site, less server resources are used, which allows pages to load faster!
You setup browser caching on the server level, via a WordPress Plugin or by editing the .htaccess file.
To determine the best method for your site, I recommend reviewing Google’s write-up Leverage Browser Caching.
19. Use a CDN
A Content Delivery Network (CDN) is a global network of servers residing in different data centers delivering web content to users based on their geographic location.
In laymen’s terms, it’s a bunch of computers that serve web content based on the site visitor’s location. For example, if one user located in London visits a website, the content might be delivered from a server somewhere in England. If another visitor from San Diego visits the same site, the content may be delivered from a server in California. The idea is to deliver the content faster, to keep page load times fast, and to ensure a great user experience for the site visitor.
A CDN is just another way to assist with the speed of your website. Google does not check to see if you are using a CDN and incorporate this variable into their algorithm. But, they certainly consider site speed when ranking a site. If you have visitors from multiple states, you really need to consider a CDN to provide a good experience for out-of-state traffic.
You can setup a CDN with Amazon CloudFront, MaxCDN, or with KeyCDN.
20. Add Image and Video Sitemaps
As you may already know, Google shows images and videos in search results. Many site owners are unaware that you can actually create image and video sitemaps. Adding an image sitemap will increase the likelihood of your site being found in the image search results. You’re probably thinking that you won’t get much traffic from image results in Google, and you’re right. But the thing about SEO is that you have to look for small edges everywhere. It’s important to get the essentials of SEO taken care of, but also look for every small advantage you can get in order to outrank your competitors.
If you have videos on your site, you will definitely want to submit a video sitemap. Make this a higher priority if your videos are marked up with metadata.
Conclusion
Most people shy away from the technical aspects of SEO due to their lack of understanding or the fear of the word technical. Far too many businesses are underrepresented in this category. Many sales people from small and large digital marketing companies tell business owners that they have an SEO package that will “optimize” their site. It can be tricky if the business owner does not know the specific questions to ask. When it comes to hiring someone for technical SEO, you must know the appropriate questions to ask so you can ensure that you are hiring the right talent.
If you took the time to read this post, you are not the average professional. You are now armed with the appropriate knowledge to start creating a technical SEO plan for your site, you are prepared to bring good discussion points to your next marketing meeting, and you can properly vet an SEO company that is attempting to sell you services.
As always, if you’re busy running a company and you do not want to tackle these items on your own, you can call me and I will gladly help. SEO is my passion and I would be delighted to implement these strategies for your business and help you outrank your competitors. Thank you for being a loyal reader, and I hope to hear from you.
Email brian@rocketpilots.com call me today at 858-775-4110 or request a no commitment consultation.
Are you implementing any of these tactics on your website? Share your experiences in the comments below. We would love to hear from you!
Brian Hansen